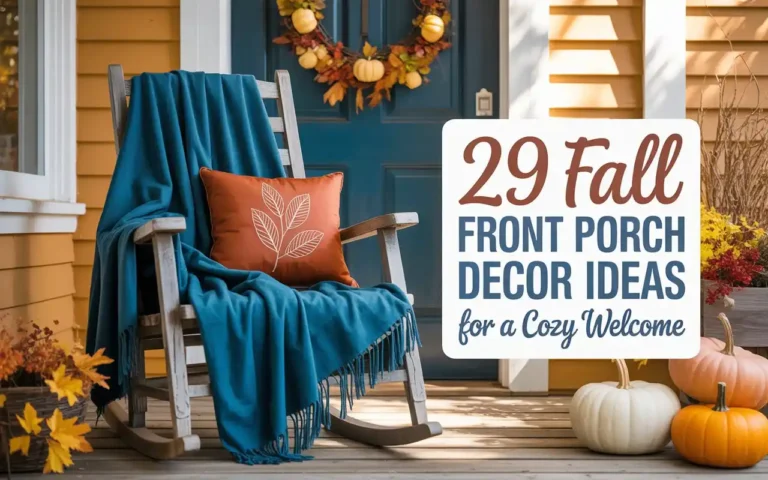
17 Fun Halloween Air-Dry Clay Ideas for Spooky Season Crafts
Halloween brings out the creative spirit in all of us, and there’s no better medium to channel that spooky energy than air-dry clay. This versatile crafting material lets you create everything from adorable pumpkin decorations to mystical witch accessories without needing a kiln or expensive equipment. Air-dry clay is perfect for Halloween crafting because it’s beginner-friendly, budget-conscious, and allows for endless customization with paints, glazes, and embellishments.
Whether you’re planning a fun family activity, looking to add handmade touches to your Halloween decor, or wanting to create unique gifts for friends, these 17 air-dry clay projects offer something for every skill level. From classic jack-o’-lanterns to trendy kawaii ghosts, each project can be completed over a weekend and will add personality to your seasonal celebrations.
The beauty of working with air-dry clay lies in its forgiving nature. Mistakes can be smoothed out, details can be added later, and the drying process gives you time to perfect your creations. Plus, once your pieces are dry, they become durable keepsakes that can be brought out year after year to celebrate the Halloween season.
Table of Contents
🎃 Classic Halloween Creations
Mini Pumpkins
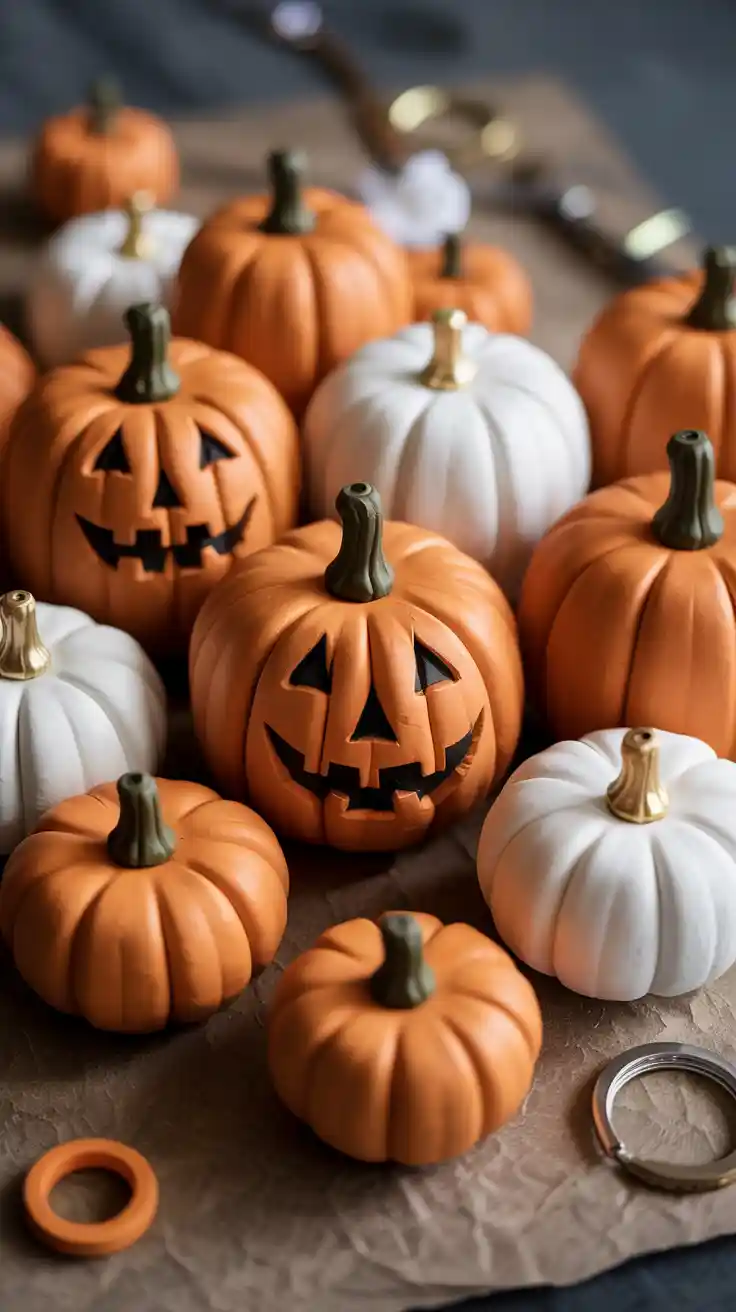
Start your Halloween clay collection with charming mini pumpkins that capture the essence of autumn. Roll your air-dry clay into smooth balls, then use a clay tool or pencil to create vertical lines from top to bottom, giving your pumpkins their characteristic ridged appearance. The key to realistic-looking pumpkins is varying the sizes and creating slight imperfections that make them appear more natural.
For carved jack-o’-lantern faces, allow your pumpkins to dry until they’re leather-hard, then carefully cut out triangle eyes and jagged smiles using a craft knife. If you prefer painted faces, let the pumpkins dry completely before adding features with black acrylic paint. Consider making a whole pumpkin patch by creating various sizes, from tiny thumbnail pumpkins to larger statement pieces that can serve as centerpieces.
The versatility of mini pumpkins makes them perfect for multiple uses. Add small magnets to the back for refrigerator decorations, drill small holes in the top for keychains, or simply arrange them as part of your Halloween tablescape. Experiment with different clay colors or paint finishes—classic orange, white for ghost pumpkins, or even metallic gold for an elegant twist.
Jack-o’-Lantern Tea Light Holder
Transform your pumpkin-making skills into functional art by creating jack-o’-lantern tea light holders. Begin by forming a hollow pumpkin shape, either by pinching out the center of a solid form or by building walls around a removable core. The walls should be thick enough to maintain structure but thin enough to allow light to pass through decoratively.
Carve your jack-o’-lantern face while the clay is still workable, making sure the eye and mouth openings are large enough to cast interesting shadows when lit. Consider creating a removable top or leaving an opening at the bottom to easily insert LED tea lights. Battery-operated LED candles are safer than real flames and won’t generate heat that could damage your clay creation.
Once dried and painted, these tea light holders create magical ambient lighting for Halloween parties or quiet autumn evenings. The warm glow emanating from the carved features brings your clay jack-o’-lantern to life, casting dancing shadows that enhance any spooky atmosphere. Make several in different sizes to create a glowing pumpkin patch display.
Ghost Figurines
Clay ghost figurines offer endless opportunities for personality and charm. Start with a rounded base and gradually build upward, creating the classic ghost silhouette with flowing, wavy edges at the bottom. The beauty of ghost figures lies in their simplicity—the basic shape is forgiving for beginners while still offering room for creative expression.
Focus on the facial expressions to give each ghost its unique character. Simple dot eyes and oval mouths can convey everything from friendly smiles to surprised gasps. For more detailed work, try adding subtle texture to suggest flowing fabric or creating dimensional features that stand out from the surface. Some ghosts might have arms reaching outward, while others could be depicted mid-float with trailing wisps.
Consider making a whole family of ghosts in various sizes and expressions. They work beautifully as standalone decorations, grouped together in spooky scenes, or incorporated into larger Halloween displays. Paint them in classic white with black features, or experiment with translucent glazes that give them an ethereal, otherworldly appearance.
Witch Hat Trinket Dish
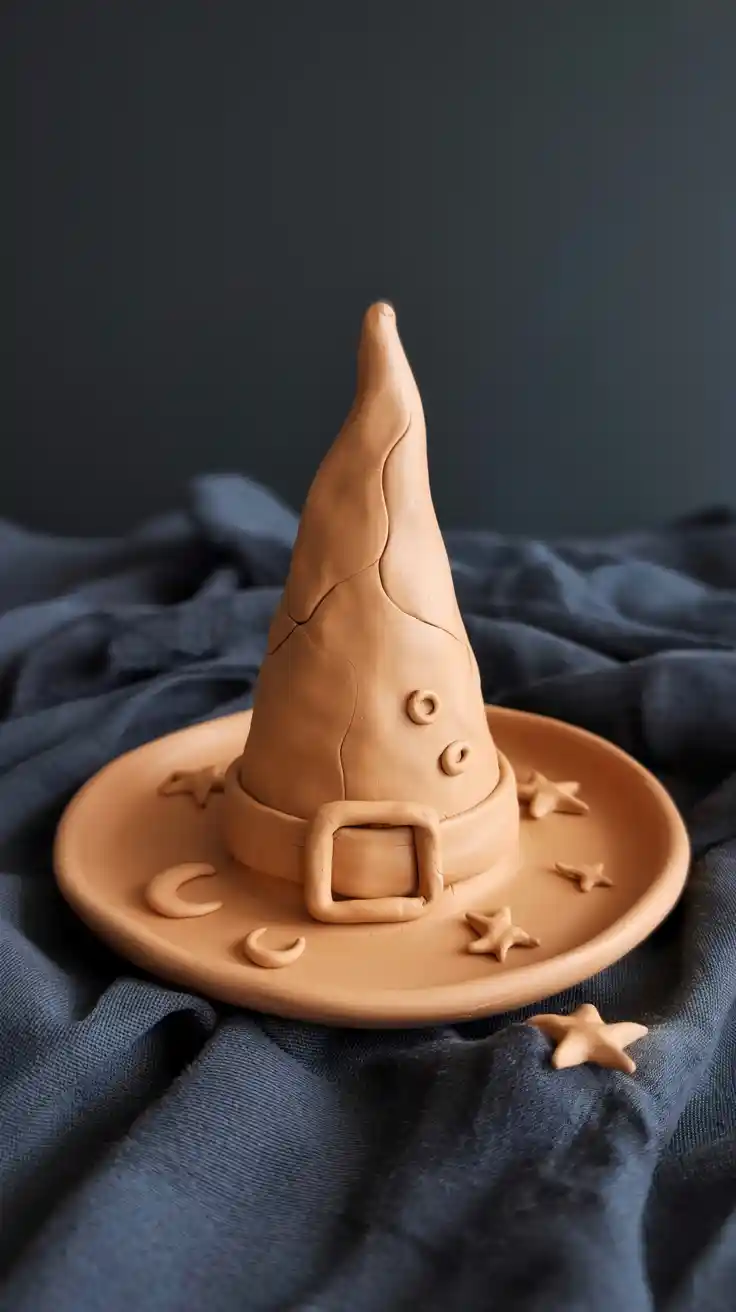
Combine functionality with Halloween flair by crafting witch hat trinket dishes perfect for holding jewelry, candy, or small decorative items. Start by creating a flat, circular base that will serve as both the foundation and the functional dish portion. The base should be wide enough to be stable and deep enough to hold your intended items.
Form the iconic witch hat cone separately, ensuring it’s proportionally correct and will attach securely to the center of the base. The cone should be tall and pointed, with a slight curve that gives it authentic witch hat character. Before the clay fully dries, score both surfaces where they’ll connect and use slip (watered-down clay) to create a strong bond.
Add personality through surface textures and decorative elements. Consider pressing fabric against the hat for a textured appearance, adding small clay buckles or bands around the hat’s base, or incorporating tiny stars and moons into the design. Once painted, these trinket dishes become both practical storage solutions and delightful Halloween decorations that can be used throughout the spooky season.
Black Cat Charms
Capture the mysterious allure of black cats with small clay charms that celebrate this classic Halloween symbol. Focus on the essential feline features—pointed ears, long curved tails, and alert expressions that convey the independent spirit cats are known for. These small-scale projects are perfect for practicing detail work and can be completed relatively quickly.
The key to successful cat charms lies in capturing the essence of feline movement and attitude. Position the tail in a graceful S-curve, angle the ears to suggest alertness, and give the body a slight arch that implies readiness to pounce. Small details like whisker marks, collar indentations, or textured fur patterns can add significant visual interest without overwhelming the small scale.
These versatile charms work wonderfully as keychains, bag accessories, or decorative elements for larger Halloween displays. Consider making cats in different poses—sitting regally, mid-prowl, or curled in sleep. While black is traditional, don’t limit yourself to a single color. Orange tabby cats, white cats with pink noses, or even fantasy colors can add whimsy to your Halloween charm collection.

🕸️ Spooky Decor Elements
Tiny Tombstones
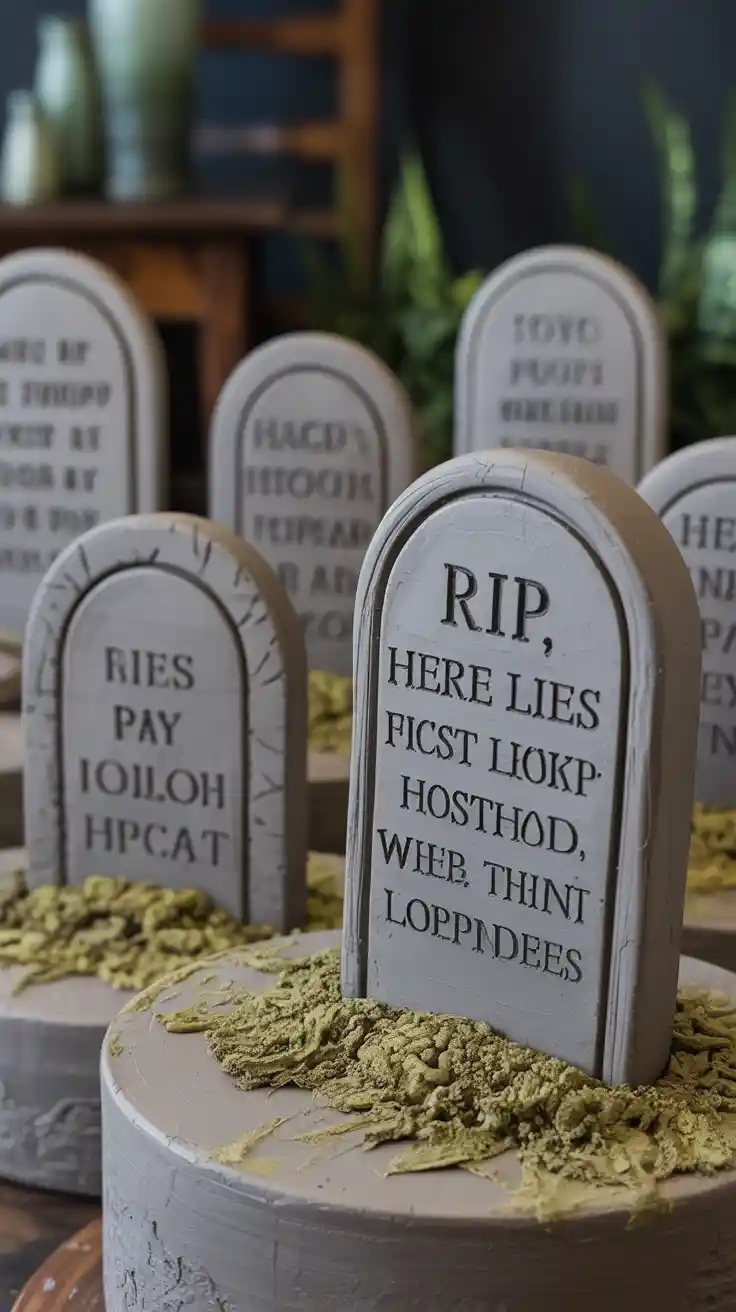
Create an atmospheric graveyard scene with miniature tombstones that pack maximum spooky impact into small packages. These clay monuments offer excellent opportunities for practicing text work and surface decoration while contributing to elaborate Halloween displays. Start with simple rectangular or arched shapes, ensuring they’re thick enough to stand independently.
The inscription possibilities are endless and allow for both humor and genuine Halloween spirit. Classic phrases like “RIP,” “Here Lies,” or “Rest in Pieces” work well, while personalized messages can reference family members, pets, or even beloved fictional characters. Use clay tools to carve text while the clay is still workable, or paint inscriptions once the piece is fully dried.
Surface treatments can dramatically enhance the aged, weathered appearance authentic to old cemetery markers. Try dry brushing darker colors into carved lines to emphasize text, sponging on moss-green paint for an aged effect, or adding texture with sandpaper once the clay is dry. Group multiple tombstones of varying heights and styles to create convincing miniature graveyard scenes that anchor larger Halloween displays.
Mini Cauldrons
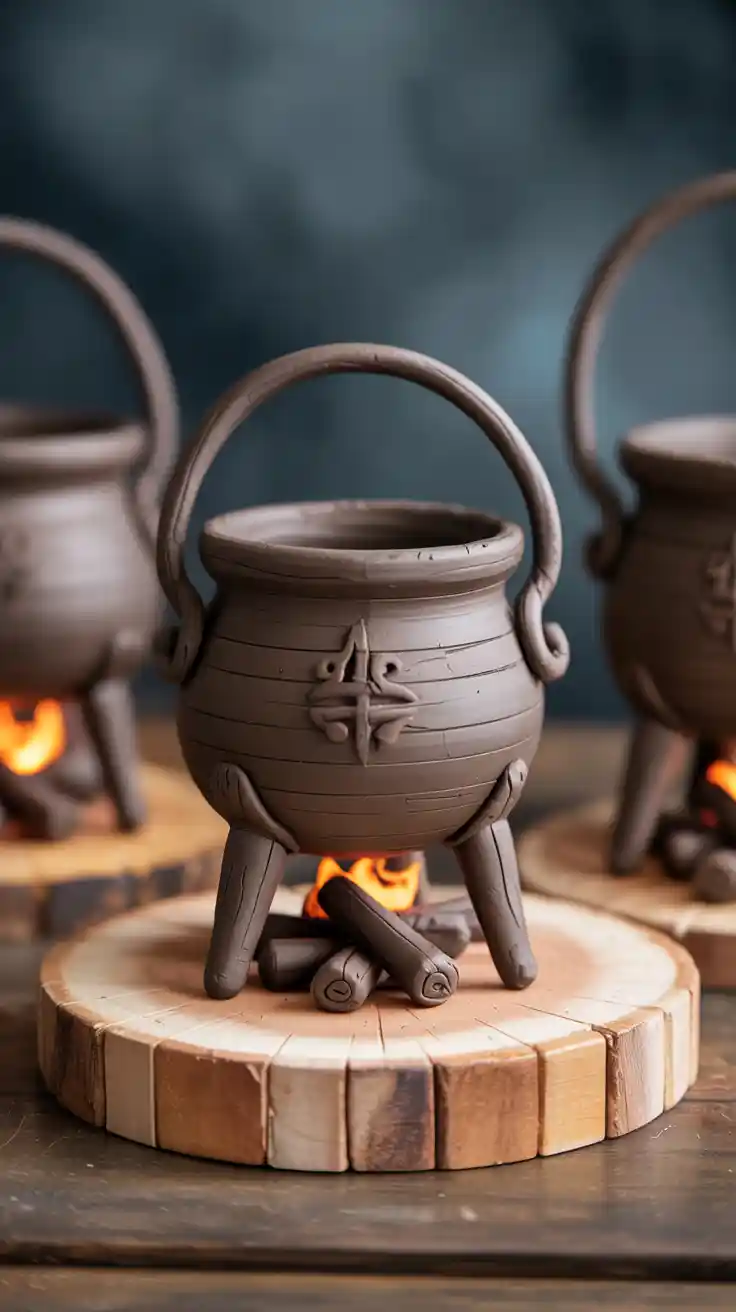
Functional mini cauldrons combine Halloween atmosphere with practical use, perfect for holding candy, small trinkets, or serving as unique decorative vessels. The rounded, pot-bellied shape characteristic of traditional cauldrons requires attention to wall thickness and structural stability, making this project slightly more challenging but ultimately rewarding.
Build your cauldron using the coil or pinch method, gradually forming the bulbous base and narrower rim opening. Don’t forget the three legs that traditionally support cauldrons over fires—these small details significantly enhance authenticity. Consider whether you want to add handles, which can be formed from clay coils or thin strips attached to opposite sides of the rim.
Surface decoration can transform simple clay vessels into convincing magical implements. Texture techniques like stippling create the appearance of cast iron, while dry brushing with metallic paints suggests age and use. Add dimensional elements like bubbling potion effects around the rim, small clay flames beneath the base, or mystical symbols carved into the sides for extra magical appeal.
Bat Ornaments
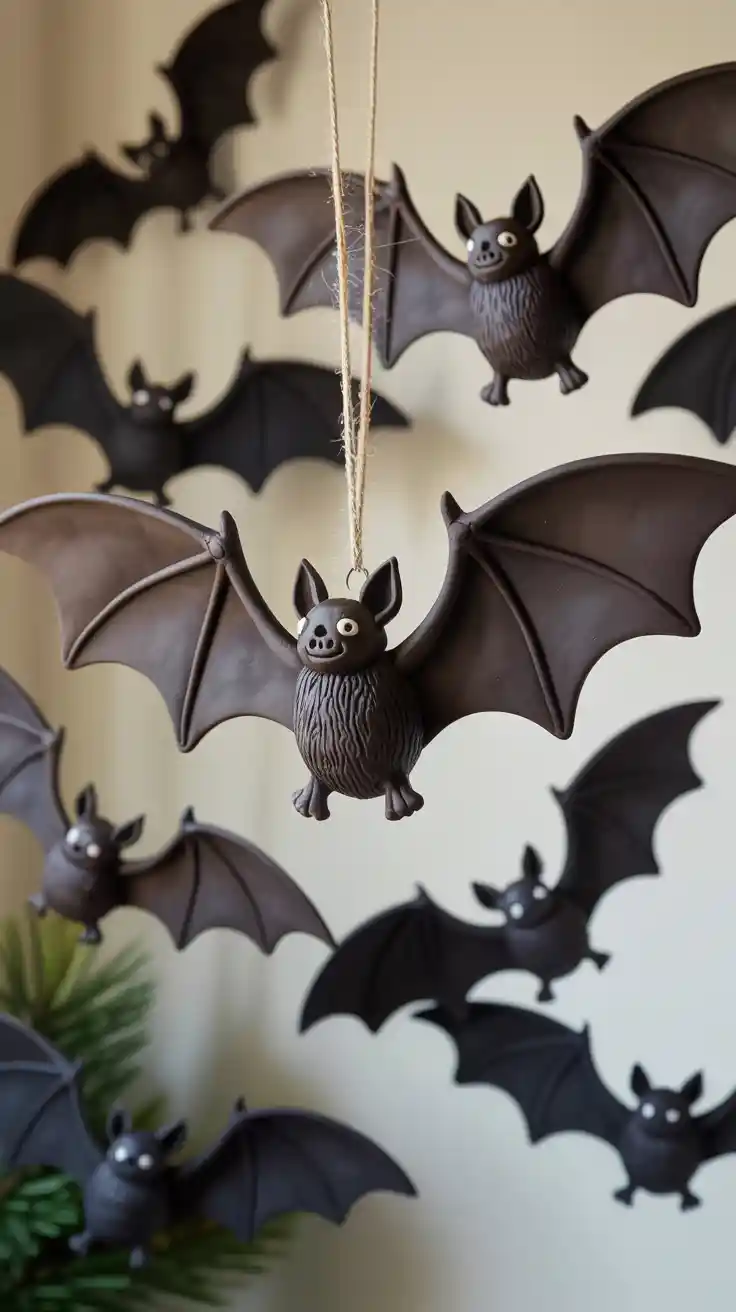
Flying bat ornaments bring dynamic movement to Halloween decorations while offering opportunities to explore wing textures and dramatic silhouettes. These pieces work exceptionally well as hanging ornaments, wall decorations, or elements in larger spooky scenes. The key challenge lies in creating wings that appear to be in mid-flight while maintaining structural integrity in clay.
Focus on wing membrane details that give bats their distinctive appearance. Use clay tools to create the finger-like bone structure that supports bat wings, adding realistic webbing patterns between each finger. The body should be small and furry-textured, with tiny pointed ears and small bead eyes that capture the alert expression of these nocturnal creatures.
Consider creating bats in various flight positions—some with wings spread wide, others in diving positions, and a few with wings folded as if resting. This variety creates visual interest when displayed together and suggests the dynamic movement of a bat colony in flight. Paint them in classic black or experiment with dark purples and browns for more naturalistic variations.
Spider Web Coaster
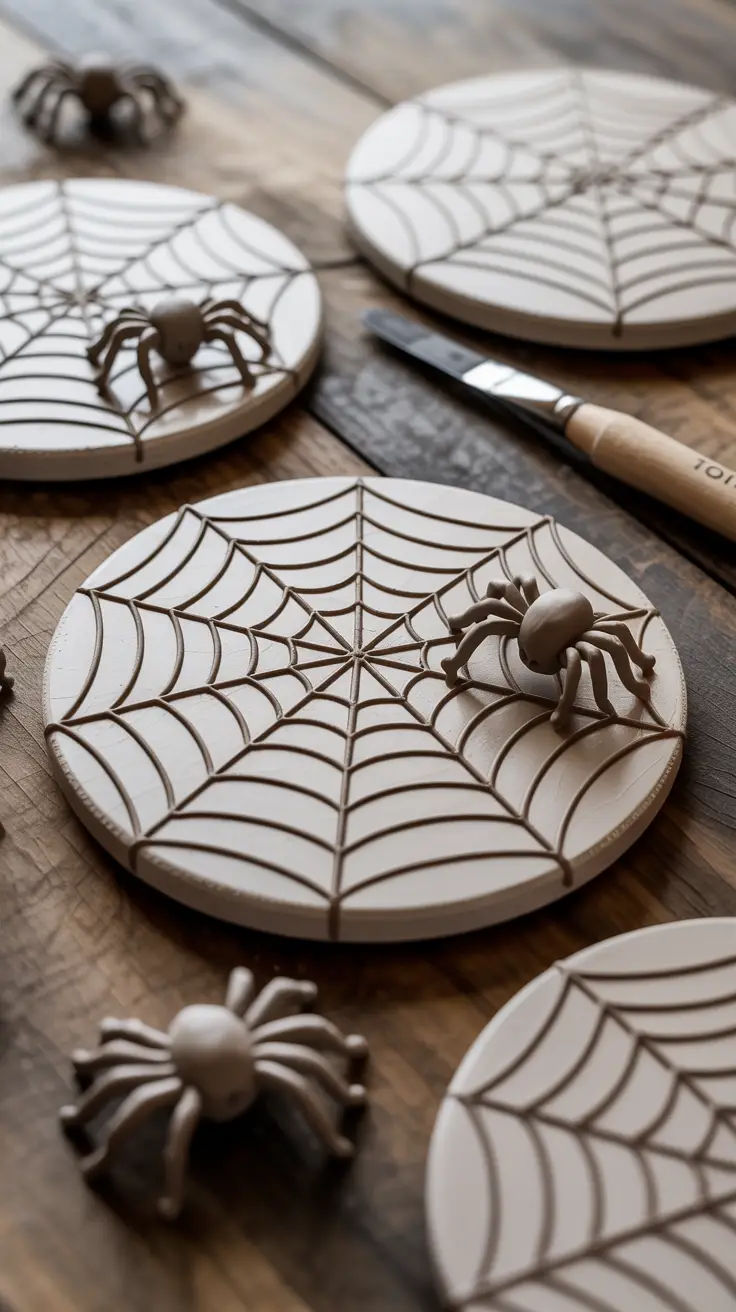
Transform ordinary coasters into fascinating conversation pieces with intricate spider web designs that celebrate one of Halloween’s most iconic symbols. These functional art pieces require patience and steady hands but result in sophisticated decorations that serve double duty throughout the Halloween season.
Start with perfectly round, flat clay discs that will provide stable bases for beverages while showcasing your web design. The web pattern begins from the center and radiates outward in concentric circles connected by radial lines. Use a clay tool or thin brush handle to create clean, consistent lines that suggest the precision of actual spider webs.
Add dimensional elements like small clay spiders positioned strategically on the web, dewdrop effects created with clear glaze, or subtle texture that suggests web movement. Consider making sets of coasters with different web patterns—some perfect and geometric, others with intentional irregularities that suggest webs caught in wind or damaged by weather.
Creepy Eyeball Beads
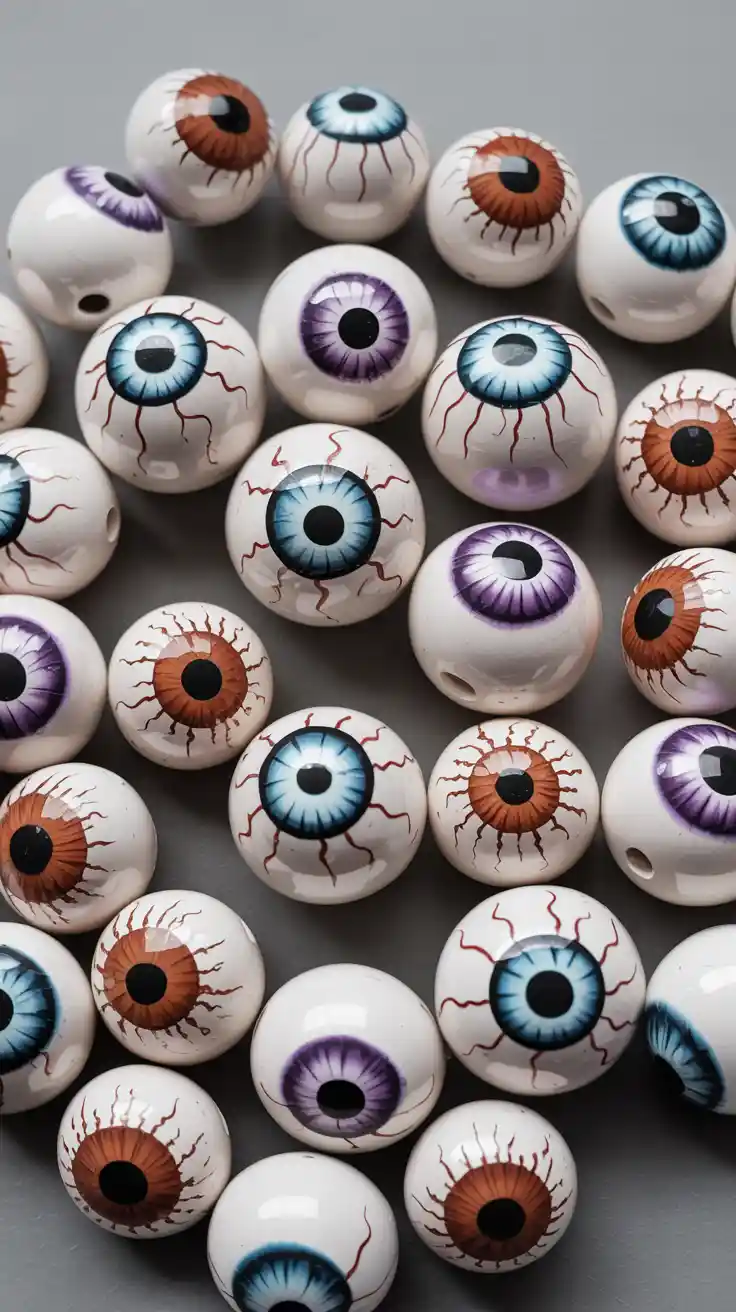
Nothing says Halloween quite like a collection of staring eyeballs, and clay eyeball beads offer endless opportunities for unsettling creativity. These small, round projects focus on painting techniques and color theory while creating versatile elements for jewelry, garlands, or decorative strings.
Perfect spheres form the foundation, with careful attention to creating holes for stringing that won’t compromise the round shape. The iris becomes your canvas for color experimentation—traditional brown and blue eyes provide realism, while unusual colors like purple, silver, or red create supernatural effects. Bloodshot veins painted in thin red lines add disturbing realism that enhances the creepy factor.
Consider creating eyes with different expressions through pupil placement and lid suggestions. Some might appear to be looking directly at viewers, while others could seem to glance sideways or appear sleepy. Vary the sizes to create visual interest when strung together, and experiment with different levels of bloodshot effects to achieve your desired level of creepiness.
🍬 Cute & Playful Projects
Candy Corn Figurines
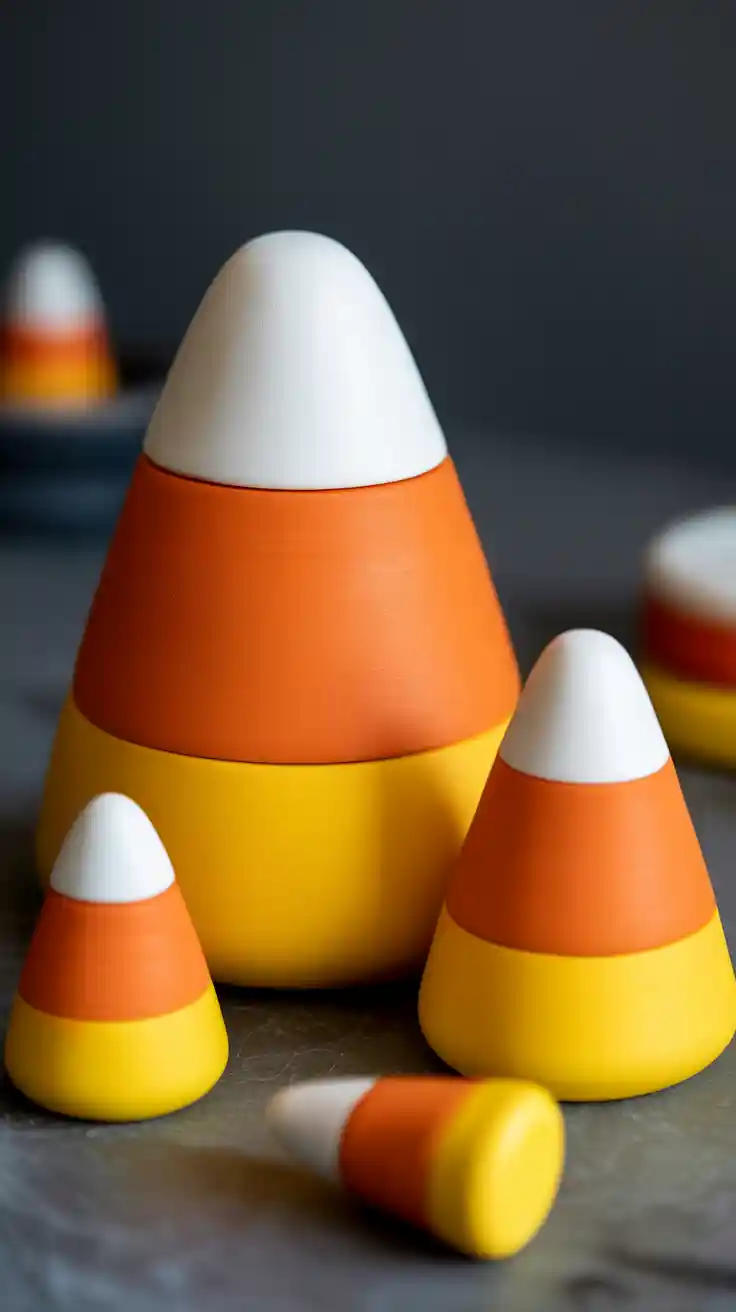
Celebrate Halloween’s most iconic treat with adorable candy corn figurines that bring sweetness to spooky decorations. These instantly recognizable triangular shapes offer opportunities to practice color blending and precise geometric forms while creating charming seasonal accents that appeal to all ages.
The classic three-color scheme requires careful attention to proportions and clean color separation. Start with the white tip, approximately one-fourth of the total height, followed by the orange middle section that comprises about half the figurine, and finish with the yellow base. Sharp, clean lines between colors create the most authentic appearance, though slightly blended edges can add artistic charm.
Beyond traditional standing figurines, consider functional variations like candy corn magnets for refrigerators, small dishes shaped like oversized candy corn pieces, or stackable versions that interlock for storage. Surface treatments can range from smooth, candy-like finishes that mimic the actual confection’s appearance to matte textures that emphasize the handmade clay nature.
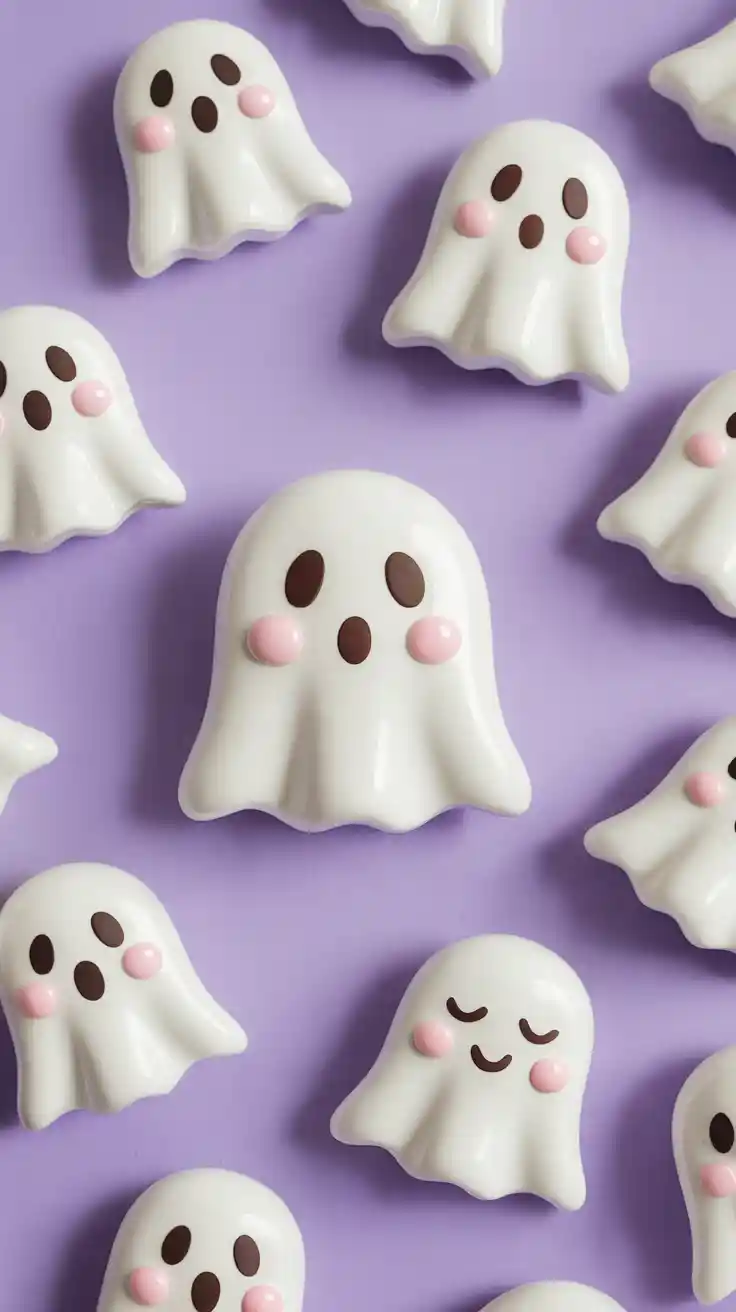
Kawaii Ghost Pins
Embrace the cute side of spooky with kawaii-style ghost pins that combine Japanese cuteness aesthetics with traditional Halloween imagery. These adorable accessories focus on simplified forms, pastel colors, and endearing facial expressions that make ghosts approachable rather than frightening.
The kawaii aesthetic emphasizes roundness, soft edges, and minimal details that maximize charm. Create ghosts with perfectly round heads, tiny dot eyes, and small curved mouths that suggest gentle smiles. Blush marks on the cheeks, created with pink paint or glaze, add to the endearing quality that defines kawaii design.
Consider variations in size and expression to create entire collections of kawaii ghost pins. Some might appear shy with downcast eyes, others could look surprised with wide eyes and small “o” mouths, and a few might even appear to be sleeping with closed eyes and peaceful expressions. Add pin backs once the clay is completely dry to create wearable Halloween accessories that spread smiles instead of scares.
Monster Face Magnets
Classic movie monsters get the miniature treatment in these fun magnet projects that celebrate Halloween’s most beloved scary characters. Frankenstein’s monster, Dracula, and mummy faces each present unique challenges in color, texture, and characteristic feature representation within small-scale formats.
Frankenstein’s monster offers opportunities to practice color mixing for that distinctive green skin tone while working with geometric features like the flat-topped head and prominent forehead. Add texture for stitching details and consider using small beads or painted highlights for the bolt details. The key lies in capturing the character’s essence while maintaining the friendly, non-threatening quality appropriate for home decorations.
Dracula magnets focus on dramatic contrasts—pale skin, dark hair, and blood-red lips create striking visual impact. The pointed ears and prominent fangs become focal points that immediately identify the character. Consider adding a small cape detail or collar suggestions that reference the classic costume elements without overwhelming the small scale.

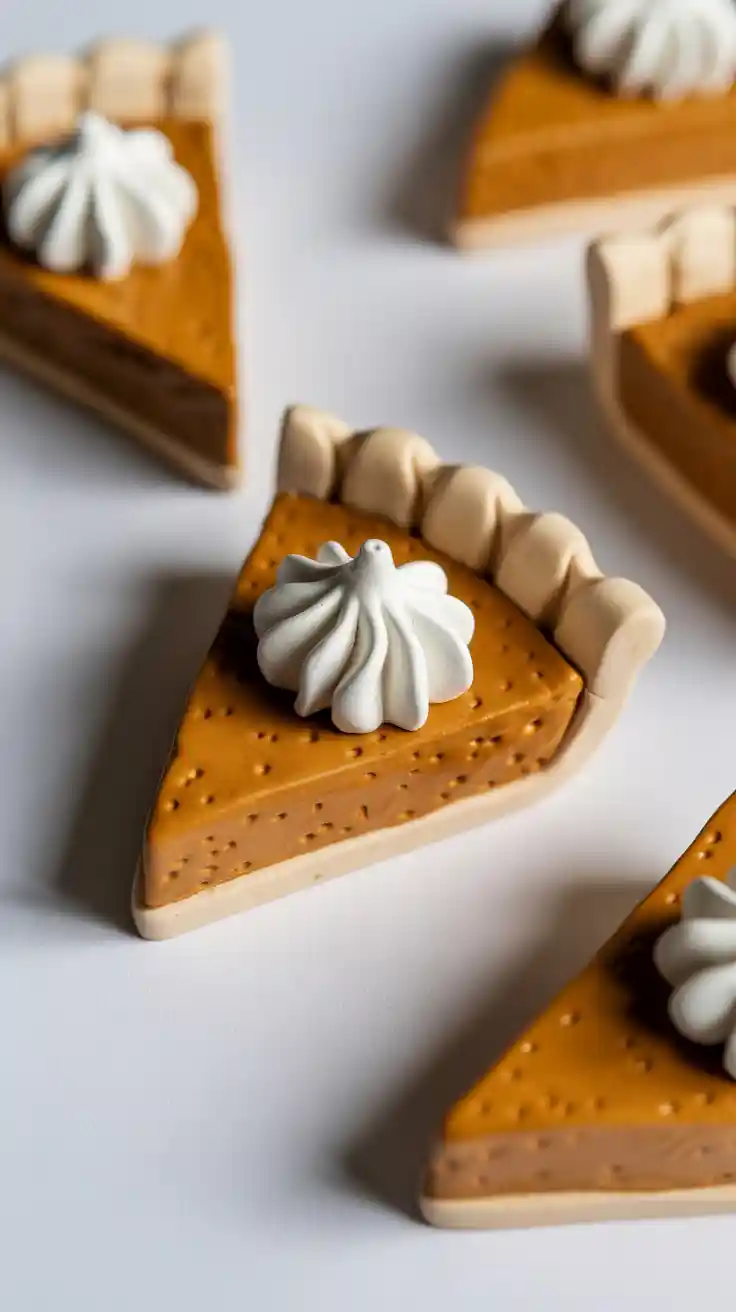
Pumpkin Pie Slice Charms
Celebrate the flavors of fall with realistic pumpkin pie slice charms that look good enough to eat. These food-inspired clay projects combine realistic color work with dimensional techniques that create convincing pie textures and toppings.
The pie slice shape requires attention to proportions and structural considerations—the point should be sharp enough to look authentic while remaining strong enough not to break during handling. Layer different clay colors to suggest the pie crust, pumpkin filling, and any desired toppings like whipped cream or decorative pie crust edges.
Surface treatments can dramatically enhance realism. Use clay tools to create fluted pie crust edges, stipple texture for realistic pumpkin filling surfaces, and add dimensional whipped cream details that appear fluffy and tempting. Consider making multiple slices with different topping arrangements or crust styles to create variety in your collection.
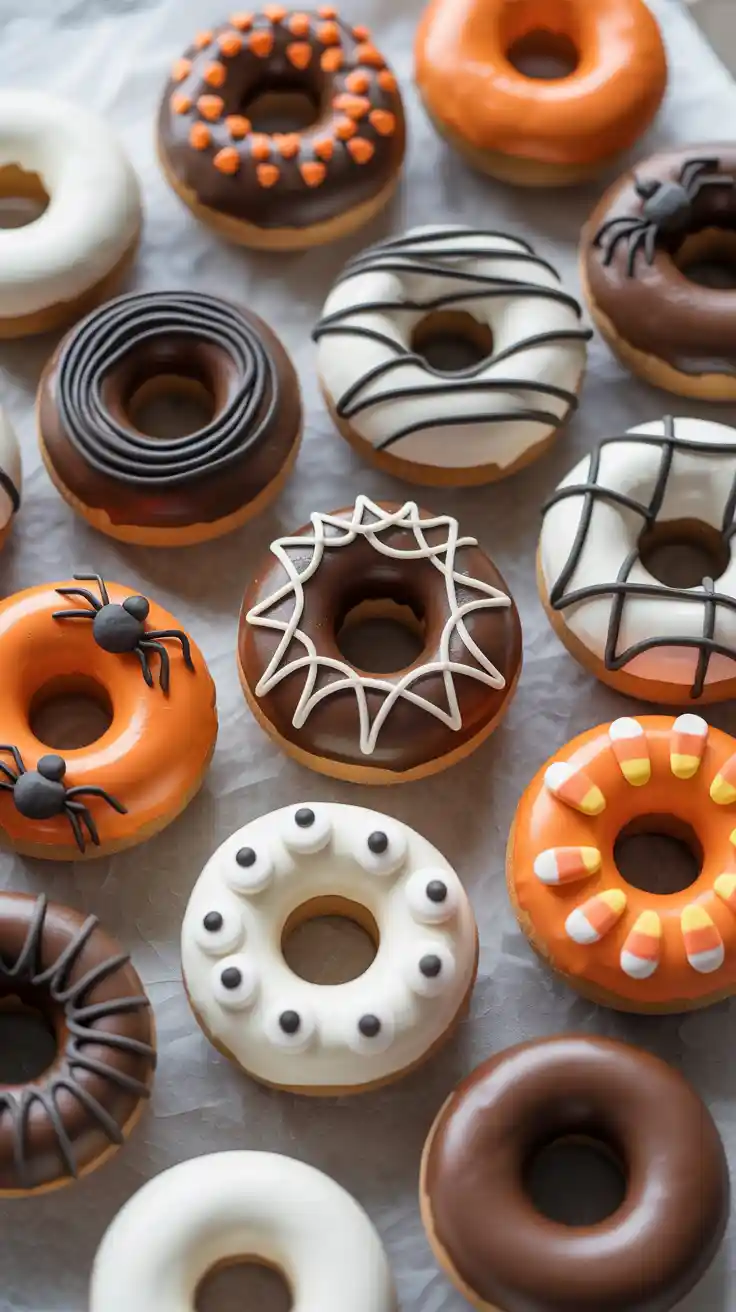
Halloween Donuts
Transform ordinary donut shapes into Halloween masterpieces with creative decorating that references classic spooky themes. These food-inspired projects offer excellent opportunities to practice both basic shaping techniques and detailed decorative work that brings miniature baked goods to life.
Start with perfect donut shapes, paying attention to the center hole proportions and overall roundness that characterizes these beloved treats. The basic form becomes a canvas for Halloween creativity—orange “frosting” with black sprinkles creates pumpkin donuts, white “frosting” with black drizzle lines suggests mummy wrapping, and chocolate “frosting” with web designs recalls spider themes.
Consider creating entire dozen collections with different Halloween themes represented. Some donuts might feature candy corn “sprinkles,” others could have small clay spider decorations, and a few might incorporate bat silhouettes cut from contrasting clay colors. The key lies in maintaining the essential donut characteristics while adding Halloween elements that enhance rather than overwhelm the basic form.
🌑 Witchy & Mystical Elements
Tap into the mystical side of Halloween with faceted crystal shard creations that bring magical energy to seasonal decorations. These geometric projects focus on clean lines, precise angles, and color techniques that suggest the inner light and energy attributed to actual crystals.
The prismatic shape requires careful attention to symmetry and proportion—each face should be clearly defined while contributing to the overall crystal structure. Start with basic geometric forms like triangular or hexagonal bases, then add faceted surfaces that catch light and create visual interest. The angles should appear sharp and clean, suggesting the natural formation processes that create actual crystals.
Color choices dramatically affect the mystical quality of your crystal shards. Deep purples suggest amethyst and spiritual connection, clear or white creates quartz-like appearance, while darker colors like black or deep green evoke more mysterious, witchy associations. Consider adding metallic highlights or iridescent finishes that suggest the inner light many associate with crystal energy.
Ouija Planchette Keychains
Create portable connections to the spirit world with miniature Ouija planchette keychains that reference this classic divination tool. These heart-shaped accessories combine historical reference with modern functionality, creating conversation pieces that celebrate Halloween’s connection to supernatural themes.
The distinctive planchette shape—essentially a heart with an extended point—requires smooth curves and precise proportions that maintain the recognizable silhouette. The central viewing window, traditionally circular, becomes a focal point that can be left open, filled with transparent material, or decorated with mystical symbols like eyes or stars.
Surface decoration should reference the mystical purpose of actual planchettes while remaining appropriate for keychain use. Consider adding small mystical symbols around the border, incorporating moon phases or star patterns, or using metallic finishes that suggest age and spiritual significance. The addition of small eye details in the viewing window creates immediate recognition while adding to the mysterious aesthetic.
Bringing Your Halloween Clay Creations to Life
Creating these 17 Halloween air-dry clay projects opens up a world of seasonal creativity that extends far beyond the crafting process itself. Each piece becomes part of your personal Halloween tradition, adding handmade charm to decorations that can be treasured for years to come. The beauty of air-dry clay lies in its accessibility—no special equipment required, just creativity and patience as your pieces slowly transform from malleable clay to durable keepsakes.
Remember that the best clay projects often come from experimenting with techniques and adding your own personal touches. Don’t be afraid to combine elements from different projects, scale pieces up or down to suit your needs, or incorporate additional materials like ribbons, glitter, or found objects that enhance your Halloween themes. The goal is to have fun while creating something uniquely yours.
As you work through these projects, consider documenting your process and results. Halloween clay crafting can become an annual tradition, with each year bringing new skills and more ambitious projects. Start with simpler designs to build confidence, then gradually tackle more complex pieces as your comfort with the medium grows. Most importantly, embrace the imperfections that make handmade items special—they’re what give your creations character and charm that mass-produced decorations simply cannot match.