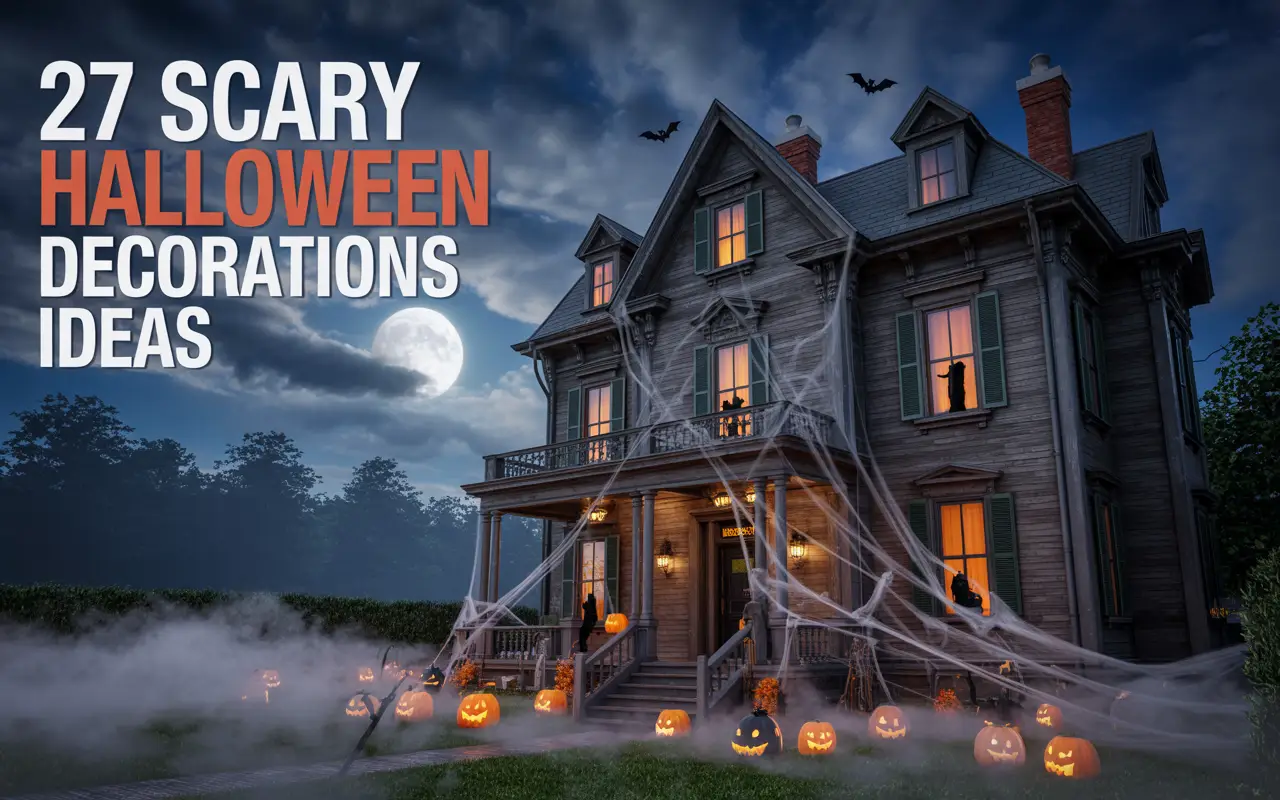
27 Scary Halloween Decorations Ideas to Create a Spine-Chilling Atmosphere
Halloween is the season to unleash your creativity and transform your home into a terrifyingly thrilling experience. Whether you’re aiming to spook trick-or-treaters, host a haunted house party, or simply embrace the eerie spirit of October, these 27 scary Halloween decoration ideas will help you craft a memorable and frightful setup. This comprehensive guide provides detailed, step-by-step instructions for each idea, ensuring your decorations are engaging, budget-friendly, and searching for Halloween inspiration. From creepy outdoor displays to haunting indoor vibes, we’ve got you covered with practical tips, safety advice, and creative touches to make your Halloween unforgettable.
Table of Contents
Why Scary Halloween Decorations Are a Must
Halloween is more than just candy and costumes—it’s about creating an immersive atmosphere that captures the spooky essence of the season. Scary decorations set the tone, turning your home into a haunted spectacle that delights guests and terrifies passersby. With the right mix of DIY projects, store-bought props, and high-tech effects, you can craft a chilling experience that’s both fun and frightening. Plus, a well-decorated home can become the talk of the neighborhood, drawing crowds and making your Halloween the stuff of legends.
This article dives into 27 unique decoration ideas, organized into categories like outdoor setups, indoor haunts, DIY projects, high-tech scares, kid-friendly options, and themed displays. Each idea includes detailed instructions, materials lists, and tips for maximizing impact while keeping safety and budget in mind. Let’s get started!
Outdoor Halloween Decorations to Terrify Trick-or-Treaters
Your front yard is the first impression for trick-or-treaters and guests, so make it unforgettable with these creepy outdoor decorations.
-
Haunted Graveyard Scene
Why It Works: A foggy graveyard is a Halloween classic that screams horror movie vibes. It’s versatile and can be as simple or elaborate as you want.
Materials:
- Cardboard or foam boards for tombstones
- Gray spray paint
- Black marker or paint for epitaphs
- Fake cobwebs (cotton batting or store-bought)
- Plastic skeletons or skulls
- Fog machine (optional)
- LED ground lights
Steps:
- Create Tombstones: Cut cardboard or foam into tombstone shapes (rectangles with rounded tops). Spray paint them gray and add epitaphs like “R.I.P. Here Lies Trouble” using a black marker or paint.
- Set the Scene: Arrange tombstones in your yard, tilting some for an aged look. Secure them with stakes or heavy rocks.
- Add Cobwebs: Stretch fake cobwebs across tombstones and nearby bushes for an abandoned feel.
- Incorporate Props: Scatter plastic skeletons or skulls around the tombstones. Place a skeleton hand emerging from the ground for extra creepiness.
- Enhance with Lighting and Fog: Use LED ground lights in white or green to cast eerie shadows. A fog machine adds a misty, haunted effect.
Tip: Check dollar stores for affordable plastic skeletons. For a budget-friendly fog machine alternative, use dry ice in a safe container with water.
-
Creepy Jack-o’-Lanterns
Why It Works: Carved pumpkins with menacing faces are a Halloween staple, and strategic lighting makes them terrifying.
Materials:
- Pumpkins (various sizes)
- Carving tools
- LED candles or string lights
- Stencils (optional)
- Paint (optional)
Steps:
- Choose Pumpkins: Select pumpkins of different sizes for variety. Larger ones work well for bold designs.
- Carve Designs: Use a carving kit to create sinister faces—think jagged mouths, hollow eyes, or vampire fangs. Stencils can help with intricate designs.
- Add Lighting: Place LED candles or battery-operated string lights inside for a glowing effect. Red or green lights amplify the creepiness.
- Enhance with Paint: Spray paint some pumpkins black or white for a ghostly or gothic look before carving.
- Arrange Strategically: Place pumpkins along your porch, steps, or driveway. Group them in clusters for a dramatic effect.
Tip: Preserve pumpkins with a bleach-water solution (1 tsp bleach per gallon of water) to prevent rotting.
-
Zombie Garden
Why It Works: A zombie apocalypse scene feels straight out of a horror movie, perfect for startling guests.
Materials:
- Plastic zombie hands or skulls
- Dirt or mulch
- Fake blood (washable)
- Torn clothing scraps
- LED spotlights
Steps:
- Create Zombie Limbs: Purchase plastic zombie hands or skulls from Halloween stores or online retailers.
- Plant the Scene: Bury the hands or skulls partially in your lawn or garden beds, leaving them poking out as if emerging.
- Add Gore: Drizzle washable fake blood around the props for a gruesome touch.
- Incorporate Clothing: Scatter torn clothing scraps near the limbs to suggest a zombie attack.
- Light It Up: Use LED spotlights in red or purple to highlight the scene at night.
Tip: Use garden stakes to secure props in windy conditions.
-
Spooky Pathway
Why It Works: A creepy pathway guides trick-or-treaters to your door with an eerie welcome.
Materials:
- Plastic skulls or lanterns
- Battery-operated candles
- Fake blood
- Glow-in-the-dark paint
- Stakes or heavy bases
Steps:
- Choose Props: Select plastic skulls, lanterns, or mason jars to line your pathway.
- Add Lighting: Place battery-operated candles inside lanterns or jars. Paint skulls with glow-in-the-dark paint for a nighttime glow.
- Create Gore: Drip fake blood on candles or skulls for a chilling effect.
- Secure the Path: Use stakes or heavy bases to keep props in place along your walkway.
- Enhance the Mood: Add cobwebs or scatter leaves for an abandoned look.
- Tip: Mix in solar-powered path lights for an eco-friendly glow.
Indoor Halloween Decorations for a Haunted House Vibe
Transform your home’s interior into a haunted mansion with these eerie decorations.
-
Ghostly Mirrors
Why It Works: Mirrors with ghostly faces create an unsettling, supernatural vibe.
Materials:
- Old mirrors or picture frames
- Removable window decals (ghostly faces)
- White or silver spray paint
- LED string lights
Steps:
- Select Mirrors: Use old mirrors or thrift store finds for an aged look.
- Apply Decals: Stick removable ghostly face decals onto the mirror. Alternatively, paint faint faces with washable white paint.
- Frame It: Spray paint the mirror frame silver or white for a ghostly effect.
- Add Lighting: Drape LED string lights around the frame to create a soft, eerie glow.
- Place Strategically: Hang the mirror in a dimly lit hallway or entryway for maximum impact.
- Tip: Test decals on a small mirror section to ensure they’re removable.
-
Bloody Handprint Wall
Why It Works: Bloody handprints evoke a crime scene vibe that’s sure to spook guests.
Materials:
- Washable red paint
- Disposable gloves
- Painter’s tape
- Drop cloth
Steps:
- Prepare the Area: Lay down a drop cloth and use painter’s tape to protect trim or furniture.
- Create Handprints: Wear gloves and dip your hands in washable red paint. Press them onto walls or doors in random patterns.
- Add Smears: Smear some handprints with a cloth for a dragged effect.
- Clean Up: Ensure paint is washable to easily remove after Halloween.
- Enhance the Scene: Add a plastic weapon or fake blood pool nearby for drama.
Tip: Test paint on a small wall section to confirm it washes off.
-
Floating Candles
Why It Works: Inspired by Harry Potter’s Great Hall, floating candles create a magical yet eerie ambiance.
Materials:
- Battery-operated candles
- Clear fishing line
- Command hooks
- White tissue paper (optional)
Steps:
Prepare Candles: Purchase battery-operated taper candles for safety.
- Create the Float Effect: Tie fishing line around each candle and suspend from ceiling hooks.
- Add Tissue Paper: Wrap candles in tissue paper for a ghostly, translucent look.
- Arrange in Clusters: Hang candles at varying heights for a dynamic effect.
- Light Safely: Ensure candles are battery-operated to avoid fire risks.
- Tip: Use removable Command hooks to avoid ceiling damage.
-
Creepy Crawlies
Why It Works: Spiders, rats, and snakes in unexpected places trigger instant chills.
Materials:
- Plastic spiders, rats, or snakes
- Double-sided tape
- Fake cobwebs
- LED spotlights
Steps:
- Choose Props: Buy realistic plastic bugs or animals from Halloween stores.
- Place Strategically: Stick them in corners, on furniture, or inside lampshades using double-sided tape.
- Add Cobwebs: Drape fake cobwebs around props for an abandoned look.
- Highlight with Lights: Use LED spotlights to draw attention to the creepiest spots.
- Mix Sizes: Combine large and small props for a realistic infestation effect.
- Tip: Check for pet or guest phobias before using bug props.
DIY Scary Halloween Decorations on a Budget
Save money with these creative, homemade decorations that pack a punch.
-
DIY Severed Head Jars
Why It Works: These gruesome jars evoke a mad scientist’s lab, perfect for a creepy vibe.
Materials:
- Glass jars
- Plastic severed heads or masks
- Food coloring
- LED tea lights
- Water
Steps:
- Prepare Jars: Clean glass jars thoroughly and remove labels.
- Add Heads: Place small plastic heads or cut-up masks inside jars.
- Create Liquid: Fill jars with water and add a few drops of green or red food coloring for a pickled effect.
- Light It Up: Place an LED tea light under or inside the jar for a glowing effect.
- Display: Arrange jars on a shelf or table, perhaps with fake cobwebs or labels like “Specimen X.”
- Tip: Use thrift store jars for a budget-friendly option.
-
Spooky Silhouettes
Why It Works: Window silhouettes create a haunted house effect visible from outside.
Materials:
- Black construction paper
- Scissors
- Double-sided tape
- LED backlights
Steps:
- Design Silhouettes: Draw or print outlines of witches, ghosts, or monsters on black paper.
- Cut Out Shapes: Carefully cut out the designs with scissors or a craft knife.
- Attach to Windows: Use double-sided tape to stick silhouettes to windows.
- Add Backlighting: Place LED lights behind the window to make silhouettes glow at night.
- Vary Sizes: Mix large and small silhouettes for depth.
Tip: Find free silhouette templates online to save time.
-
Fake Cobwebs
Why It Works: Cobwebs instantly make any space feel abandoned and creepy.
Materials:
- Cotton batting or store-bought cobwebs
- Plastic spiders
- Double-sided tape
Steps:
- Stretch Cobwebs: Pull cotton batting or store-bought cobwebs into thin, wispy strands.
- Apply to Surfaces: Drape over furniture, corners, or doorways, securing with tape if needed.
- Add Spiders: Scatter plastic spiders throughout the cobwebs for realism.
- Layer for Effect: Use multiple layers to create a thick, dusty look.
- Avoid Overuse: Focus on key areas to avoid a cluttered appearance.
Tip: Cotton batting is cheaper and reusable compared to store-bought cobwebs.
-
Bloody Footprints
Why It Works: Footprints leading to a “crime scene” create a chilling narrative.
Materials:
- Washable red paint
- Sponge or shoe sole
- Drop cloth
- Painter’s tape
Steps:
- Protect Surfaces: Lay down a drop cloth and tape off areas you don’t want painted.
- Create Footprints: Dip a sponge or old shoe sole in washable red paint and press onto floors or walls.
- Vary the Path: Make footprints lead to a closet, basement, or fake body prop.
- Add Smears: Smudge some prints for a dragged effect.
- Clean Up: Ensure paint is washable for easy removal.
Tip: Test paint on a small area to confirm it’s removable.
High-Tech Halloween Decorations for Maximum Scares
Take your decorations to the next level with technology-driven scares.
-
Motion-Activated Props
Why It Works: Motion sensors surprise guests with sudden screams or movements.
Materials:
- Motion-activated props (screaming skulls, jumping spiders)
- Batteries
- Double-sided tape
Steps:
- Choose Props: Buy motion-activated props like screaming skulls or animated witches.
- Test Sensors: Ensure props activate reliably with motion.
- Place Strategically: Position in high-traffic areas like doorways or hallways.
- Secure Props: Use tape or bases to keep props in place.
- Check Batteries: Replace batteries before Halloween night to avoid malfunctions.
Tip: Look for props with adjustable sensitivity to avoid constant triggering.
-
Holographic Ghosts
Why It Works: Holograms create a supernatural effect that feels otherworldly.
Materials:
- Projector
- Sheer fabric or plastic sheet
- Ghost video loop (online)
- Speakers (optional)
Steps:
- Set Up Projector: Position a projector in a window or dark room.
- Hang Fabric: Suspend sheer fabric or a clear plastic sheet as a projection surface.
- Play Ghost Video: Download a ghost video loop from YouTube or create your own.
- Add Sound: Connect speakers to play eerie moans or whispers.
- Adjust for Effect: Angle the projector to make ghosts appear to float.
Tip: Test the setup at night to ensure visibility.
-
Sound Effects
Why It Works: Eerie sounds immerse guests in a haunted atmosphere.
Materials:
- Bluetooth speaker
- Halloween soundtracks (online)
- Phone or MP3 player
Steps:
- Choose Sounds: Download soundtracks with howling winds, ghostly moans, or creaking doors.
- Hide Speaker: Place a Bluetooth speaker in a discreet location like behind furniture.
- Loop Playback: Set the soundtrack to loop continuously.
- Test Volume: Ensure sounds are audible but not overpowering.
- Sync with Decor: Match sounds to your theme (e.g., screams for a zombie setup).
Tip: Free sound effects are available on sites like Freesound.org.
-
Fog Machines
Why It Works: Fog creates a mysterious, horror-movie atmosphere.
- Materials:
- Fog machine
- Fog fluid
- Extension cord
- Timer (optional)
Steps:
- Set Up Machine: Place the fog machine in a safe, ventilated area.
- Fill with Fluid: Add fog fluid according to the machine’s instructions.
- Position Strategically: Aim fog at key areas like a graveyard or porch.
- Use a Timer: Set a timer for periodic fog bursts to conserve fluid.
- Test Safety: Ensure fog doesn’t obstruct pathways or trigger smoke alarms.
Tip: Combine with colored lights for a more dramatic effect.
Kid-Friendly Scary Decorations
Keep the spooky fun safe and age-appropriate for younger guests.
-
Friendly Ghosts
Why It Works: Cute ghosts are spooky without being terrifying for kids.
Materials:
- White cheesecloth
- Balloons
- Black marker
- Fishing line
- LED tea lights
Steps:
- Create Ghost Heads: Inflate small balloons and draw friendly faces with a black marker.
- Drape Cheesecloth: Cut cheesecloth into squares and drape over balloons.
- Secure Ghosts: Tie fishing line around the “neck” to hang from ceilings or trees.
- Add Lighting: Place LED tea lights under ghosts for a soft glow.
- Hang in Groups: Cluster ghosts for a playful, floating effect.
Tip: Use helium balloons for a floating effect without fishing line.
-
Glow-in-the-Dark Skeletons
Why It Works: Glowing skeletons are fun and spooky without being too scary.
Materials:
- Glow-in-the-dark skeleton decals
- Plastic skeleton props
- Glow-in-the-dark paint
- Double-sided tape
Steps:
- Choose Props: Buy glow-in-the-dark skeleton decals or small plastic skeletons.
- Paint if Needed: Apply glow-in-the-dark paint to plain skeletons for extra glow.
- Place Decorations: Stick decals on walls or place skeletons on shelves.
- Charge with Light: Expose props to light before Halloween night to maximize glow.
- Mix Sizes: Use small and large skeletons for variety.
Tip: Charge props with a flashlight for a quick glow boost.
-
Monster Door Decor
Why It Works: A monster face on your door is a fun, welcoming scare for kids.
Materials:
- Colored construction paper
- Scissors
- Double-sided tape
- Googly eyes
Steps:
- Design the Monster: Cut out large eyes, teeth, and facial features from construction paper.
- Assemble the Face: Use tape to attach features to your front door, creating a monster face.
- Add Googly Eyes: Stick on large googly eyes for a playful touch.
- Secure Firmly: Ensure tape holds in windy conditions.
- Keep It Friendly: Avoid overly scary features for young kids.
Tip: Use removable tape to avoid door damage.
-
Witch’s Cauldron
Why It Works: A bubbling cauldron is magical and safe for kids to enjoy.
Materials:
- Black cauldron (plastic)
- Dry ice
- Water
- LED lights
- Plastic potion bottles
Steps:
- Set Up Cauldron: Place a plastic cauldron on a stable surface.
- Add Dry Ice: Carefully add small pieces of dry ice and water for a bubbling effect (handle with gloves).
- Light It Up: Place LED lights inside or around the cauldron for a glowing effect.
- Add Props: Surround with plastic potion bottles or fake spiders.
- Supervise: Ensure kids don’t touch dry ice.
Tip: Purchase dry ice from a local grocery store and follow safety guidelines.
Themed Halloween Decoration Ideas
Create a cohesive look with these themed setups.
-
Haunted Mansion
Why It Works: A gothic, elegant haunt feels like a Disney-inspired horror experience.
Materials:
- Candelabras
- Velvet fabric
- Plastic skulls
- Black lace
- LED candles
Steps:
- Set the Mood: Drape velvet fabric over furniture for a luxurious, gothic look.
- Add Candelabras: Place candelabras with LED candles on tables or mantels.
- Incorporate Skulls: Scatter plastic skulls or skeleton hands for a creepy touch.
- Use Lace: Hang black lace curtains or table runners for an aged effect.
- Dim Lighting: Use low-wattage bulbs or LED candles to keep it moody.
Tip: Thrift stores are great for finding affordable candelabras or fabric.
-
Abandoned Asylum
Why It Works: A creepy hospital theme taps into psychological horror.
Materials:
- Plastic syringes
- Torn straitjackets (old shirts)
- Fake blood
- Medical charts (printed)
- LED spotlights
Steps:
- Create Props: Use plastic syringes or medical tools as decor.
- Add Clothing: Drape torn shirts to resemble straitjackets over chairs.
- Apply Fake Blood: Drizzle washable fake blood on props or walls.
- Hang Charts: Print fake medical charts and hang them crookedly.
- Light It Up: Use red LED spotlights for a bloody ambiance.
Tip: Check party stores for medical-themed props.
-
Witch’s Lair
Why It Works: A magical, witchy vibe combines spooky and enchanting elements.
Materials:
- Plastic cauldron
- Broomsticks
- Potion bottles
- Green LED lights
- Fake cobwebs
Steps:
- Set Up Cauldron: Place a cauldron as the centerpiece, filled with dry ice or LED lights.
- Add Brooms: Lean broomsticks against walls or hang them.
- Create Potions: Fill glass bottles with colored water and label as potions.
- Light with Green: Use green LED lights for a witchy glow.
- Add Cobwebs: Drape cobwebs for an ancient, mystical feel.
Tip: Use mason jars for potion bottles to save money.
-
Vampire’s Den
Why It Works: A gothic vampire theme is seductive and terrifying.
Materials:
- Red velvet fabric
- Fake blood
- Plastic fangs
- Red LED lights
- Candelabras
Steps:
- Drape Fabric: Cover furniture with red velvet for a luxurious look.
- Add Blood: Drizzle fake blood on tables or props.
- Incorporate Fangs: Scatter plastic fangs or vampire masks as decor.
- Use Red Lighting: Place red LED lights to create a bloody ambiance.
- Add Candelabras: Use candelabras with LED candles for gothic elegance.
Tip: Red cellophane over lights can create a budget-friendly red glow.
Safety Tips for Scary Halloween Decorations
- Fire Safety: Use LED or battery-operated lights instead of real candles to prevent fires.
- Weatherproofing: Secure outdoor decorations with stakes or weights to withstand wind and rain.
- Clear Pathways: Ensure walkways are free of tripping hazards for trick-or-treaters.
- Child Safety: Avoid sharp or heavy props in areas where kids play.
- Electrical Safety: Check cords for damage and avoid overloading outlets.
Key Takeaways
- Mix and Match: Combine DIY, store-bought, and high-tech decorations for a unique setup.
- Budget-Friendly Options: Use household items like cardboard, paint, or old sheets for affordable scares.
- Safety First: Prioritize flame-resistant materials and safe lighting to protect guests.
- Theme Consistency: Choose a theme like a haunted graveyard or vampire den for a cohesive look.
- Immersive Experience: Engage all senses with visuals, sounds, and even fog for a memorable haunt.
FAQs About Scary Halloween Decorations
What are some cheap scary Halloween decoration ideas?
DIY tombstones from cardboard, fake cobwebs from cotton batting, and bloody handprints with washable paint are budget-friendly options. Repurpose household items like jars for severed head displays or old sheets for ghostly figures.
How can I make my Halloween decorations safe for kids?
Use soft materials, avoid sharp objects, and opt for battery-operated lights. Kid-friendly ideas like glow-in-the-dark skeletons or friendly ghosts keep the spooky fun without being too scary.
Where can I buy scary Halloween decorations?
Retailers like Amazon, Walmart, Spirit Halloween, and Etsy offer a wide range of spooky props. Local thrift stores are great for unique, budget-friendly finds like old mirrors or candelabras.
How do I store Halloween decorations after the season?
Store decorations in labeled plastic bins to protect from dust and moisture. Wrap delicate items like lights or glass props in bubble wrap and keep them in a dry, cool place.
Can I make my Halloween decorations weatherproof for outdoor use?
Use weather-resistant materials like plastic or treated wood for outdoor props. Secure decorations with stakes or weights and avoid paper-based items that can get ruined by rain.
How do I create a cohesive Halloween theme?
Choose a theme like a haunted mansion or zombie apocalypse and stick to consistent colors, props, and lighting. For example, use red and black for a vampire den or gray and green for a graveyard.
Conclusion
With these 27 scary Halloween decoration ideas, you can transform your home into a frightful masterpiece that captivates trick-or-treaters, guests, and neighbors. From DIY tombstones and bloody handprints to high-tech holograms and fog machines, there’s something for every skill level and budget. Prioritize safety, get creative, and let your spooky imagination run wild. Make this Halloween the most terrifyingly unforgettable yet!